By Abigail Bartalini, Becky Hassan and Bryce Carreiro
Yal-Day-New Day Care Center Inc. in Brighton is excited for Thanksgivukkah! In celebration of this unique double holiday, we have compiled our favorite holiday activities for parents to enjoy with their children. These age-appropriate activities were initially created for our classroom students but can easily be completed at home with kids ages 2-3 years old. (Find our favorite toddler-approved holiday recipes here.)
Pinecone Turkeys
As you’re cleaning up your yard this fall, set aside a few pinecones to use in this cute Thanksgiving craft. Or take a nature walk with the kiddos and collect your own.
Materials
Pinecones
Felt
Feathers
Goggly eyes
Scissors
Craft glue (regular or hot glue)
Note: Don’t have felt, feathers or goggly eyes? Go green! Use junk mail, food boxes and other paper waste instead to create recycled eyes, noses and feathers.
Instructions
Cut feathers in half (if using). Use a small amount of glue to adhere the feathers or other materials. Then glue the eyes and beak. (See an example here.)
Glove “Talking” Turkeys
The turkey on the table doesn’t have to be the only bird present at Thanksgiving!
Materials
White gloves
Felt
Buttons
Markers
Scissors
Craft glue (regular or hot glue)
Instructions
Use red, orange, yellow and brown markers to decorate white gloves with turkey feather designs. Cut out pieces of felt for the wings and beak. Glue the felt pieces and a button eye on the glove. (See an example here.)
Gobble gobble! Children of all ages love puppets. Use your “talking” turkey as an opportunity to teach your child about turkeys and the sounds they make.
Corn Collage
Even the tiniest hands can help with this easy Thanksgiving craft. Fall means harvest time and corn husks! Share in the harvest with your kids by making this cute and festive corn collage to display.
Materials
Yellow and green construction paper
Popped corn
Jumbo craft sticks (or Popsicle sticks)
Scissors
Craft glue (hot glue is not recommended)
Instructions
Trace and cut a corn pattern on the construction paper, cutting the cob separately from the leaves. Glue the yellow cob onto the green leaves. Put a layer of glue on the yellow corn cob and cover the glue with popped corn. Let dry. (You can stop here if you want the simple version of this craft.) For the 360-degree version, make a second corn husk to glue on the back of the first one. Glue a craft stick to the back of one of the completed corn cobs. Sandwich the craft stick between the two corn cobs, lining up the leaves before gluing them together. When dry, you can insert the craft sticks into some floral foam or Styrofoam to display on your holiday table. (See an example here.)
Thankful Turkey Treat Jar
Have leftover candy from Halloween? Instead of tossing it, make a thankful turkey treat jar and teach your child gratitude using tasty rewards.
Materials
Baby food jar with lid (or any small jar)
Candy
Orange, yellow, red and brown construction paper
Goggly eyes
Scissors
Markers
Craft glue (regular or hot glue)
Tape
Instructions
Encourage your child to help sort through the candy and pick pieces to put into the jar. Make sure the jar is full and the lid is on tightly. Using colored construction paper, draw and cut out feathers and a small triangle for the turkey’s beak. Encourage your child to help you brainstorm the people, places and things he/she is thankful for. Take turns coming up with ideas and write them on each feather. Tape the feathers on the back of the jar so you and your child can see and read the feathers from the front. Glue on the beak and goggly eyes. Let dry. (See an example here.)
Each time you or your child reaches for the jar for a treat, discuss the real meaning of Thanksgiving and what you both are thankful for.
Fizzle Mini Pumpkin Painting
This is an art project and science experiment in one!
Materials
Mini pumpkins
Baking soda
Vinegar
Tempera paint
Bowls
Paintbrushes
Spoon
Eye dropper or straw
Instructions
Using a spoon, mix the paint in a bowl of baking soda. Use three parts baking soda to every one part tempera paint. Make as many mixtures as you’d like, depending on the colors you plan to use. (Note: Paint mixture should not clump or seem powdery.) Paint the pumpkins. Once the pumpkins are painted, use an eye dropper or straw to help your child transfer the vinegar onto the pumpkins where the paint is. The paint should fizzle and bubble as it reacts with the baking soda in the paint. Continue to paint and add more vinegar as desired. Once finished, leave pumpkins on a flat surface to dry. (See an example here.)
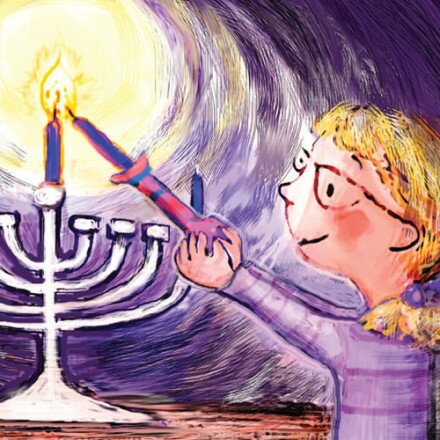
Handprint Menorah
Celebrate the Festival of Lights by creating a menorah using your child’s hands.
Materials
Newspaper
White paper (or construction paper)
Blue paint
Yellow paint
Paper plates
Paintbrush (optional)
Instructions
Spread newspaper over your work area to avoid any extra mess. Pour blue and yellow paint on paper plates. Make sure you have your paper ready! Place your child’s hands in blue paint, ensuring your toddler’s palms and fingers are covered. (If this is a little challenging, you can use a paintbrush to paint his/her palms and fingers with the blue paint.) Next, in the middle of your paper, line up the paint-covered hands side-by-side, with thumbs touching. Gently and firmly press hands onto the paper. Wipe off hands, then dip your toddler’s index finger into the yellow paint and have him or her press on top of each “candle” to create flames. Let dry. (See an example here.)
Abigail Bartalini, Becky Hassan and Bryce Carreiro are young toddler teachers at Yal-Day-New Day Care Center Inc.


[…] Thanksgivukkah Ideas for ToddlersThe blog, Thanksgivukkah, offers ideas for pine cone turkeys, glove “talking” turkeys, turkey treat jars, and more. […]