0
0 0
0 0
0
By Erica Smiley
As the K-8 art teacher at The Rashi School, one of my most important educational goals is to help students connect their Jewish and secular lives. Rabbi Ellen Pildis, the school’s rabbi, often wisely reminds us that “we are all Torah teachers.” My role is to guide students toward expressing these connections in a beautiful and visually meaningful way. Below I highlight a fun and thought-provoking “Thanksgivukkah” project that you can try at home with just cardboard, paint and glue.
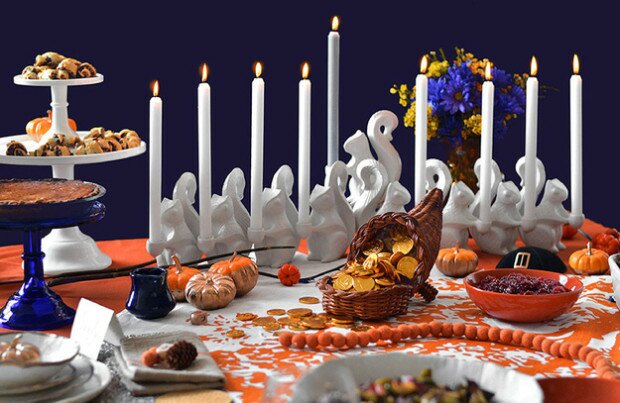
 This year, the juxtaposition of Hanukkah and Thanksgiving presents a unique opportunity to have students experience these important connections. Practicing thankfulness and passing the value of thankfulness from generation to generation is an integral part of Judaism. So, then, what a serendipitous event it is that this holiday of Thanks(fullness)giving coincides with Hanukkah, a holiday when we express our gratitude for both the great historical miracle of the eight nights of oil and the modern miracles of family, food and freedom.
At The Rashi School, each student creates a piece of Hanukkah Judaica to take home and share with their family. This year I am excited to add the “Thanksgivukkah” theme to the projects. I will brainstorm with the students to help them make connections and add Thanksgiving themes to their Hanukkah projects. I believe that seeking connections and common themes between Thanksgiving and Hanukkah will enhance students’ understanding and experience of both holidays.
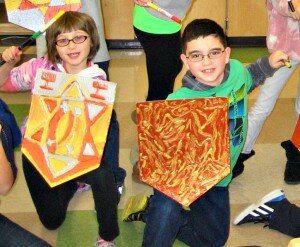
Here’s a project I did last year with the fourth grade that you can try at home. I love this project because I think it’s appealing and accessible for a wide range of ages. Even adults will have a great time! The kids loved posing dramatically with their shields, as seen in the photos.
Maccabee Shields
Time
Two to three hours (with time for glue to dry overnight)
Materials
- Cardboard (one hexagonal piece and one 7- or 8-inch strip)
- Strong scissors
- Hot glue gun
- Elmer’s Glue in a bottle
- Metallic paint (acrylic or tempera)
Directions
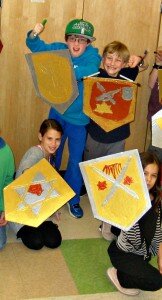 Together with your children, brainstorm some of the themes and connections between Thanksgiving and Hanukkah (for example, freedom, celebration, family, food and togetherness). Then talk about what kinds of pictures and symbols these themes make them think of. You may want to have them sketch it out, or you can also look up pictures of shields for design ideas (The Metropolitan Museum of Art has a great collection if you use their search engine). You can encourage kids to use words (Hebrew and/or English) as well.
Draw your designs on the cardboard shield shape with pencil. Then, slowly and carefully, go over the designs with lines of glue. The glue will dry in several hours or overnight (you’ll know it’s dry when it is clear and raised). When the glue is thoroughly dry (very important!) paint over the entire surface of cardboard and glue with metallic paint. The raised glue lines will show through as if they were carved by a metal smith. Use a glue gun to attach a cardboard strip to the back as a handle.
Erica Smiley is the K-8 art teacher at The Rashi School in Dedham, where she is in her ninth year of teaching. She graduated from the Harvard Graduate School of Education in 2004 with an Ed.M. in arts in education. When she’s not teaching art, she’s making it—especially mosaics, watercolors, jewelry and crochet. You can read more about art at The Rashi School at mrssmileysartroom.blogspot.com.
000